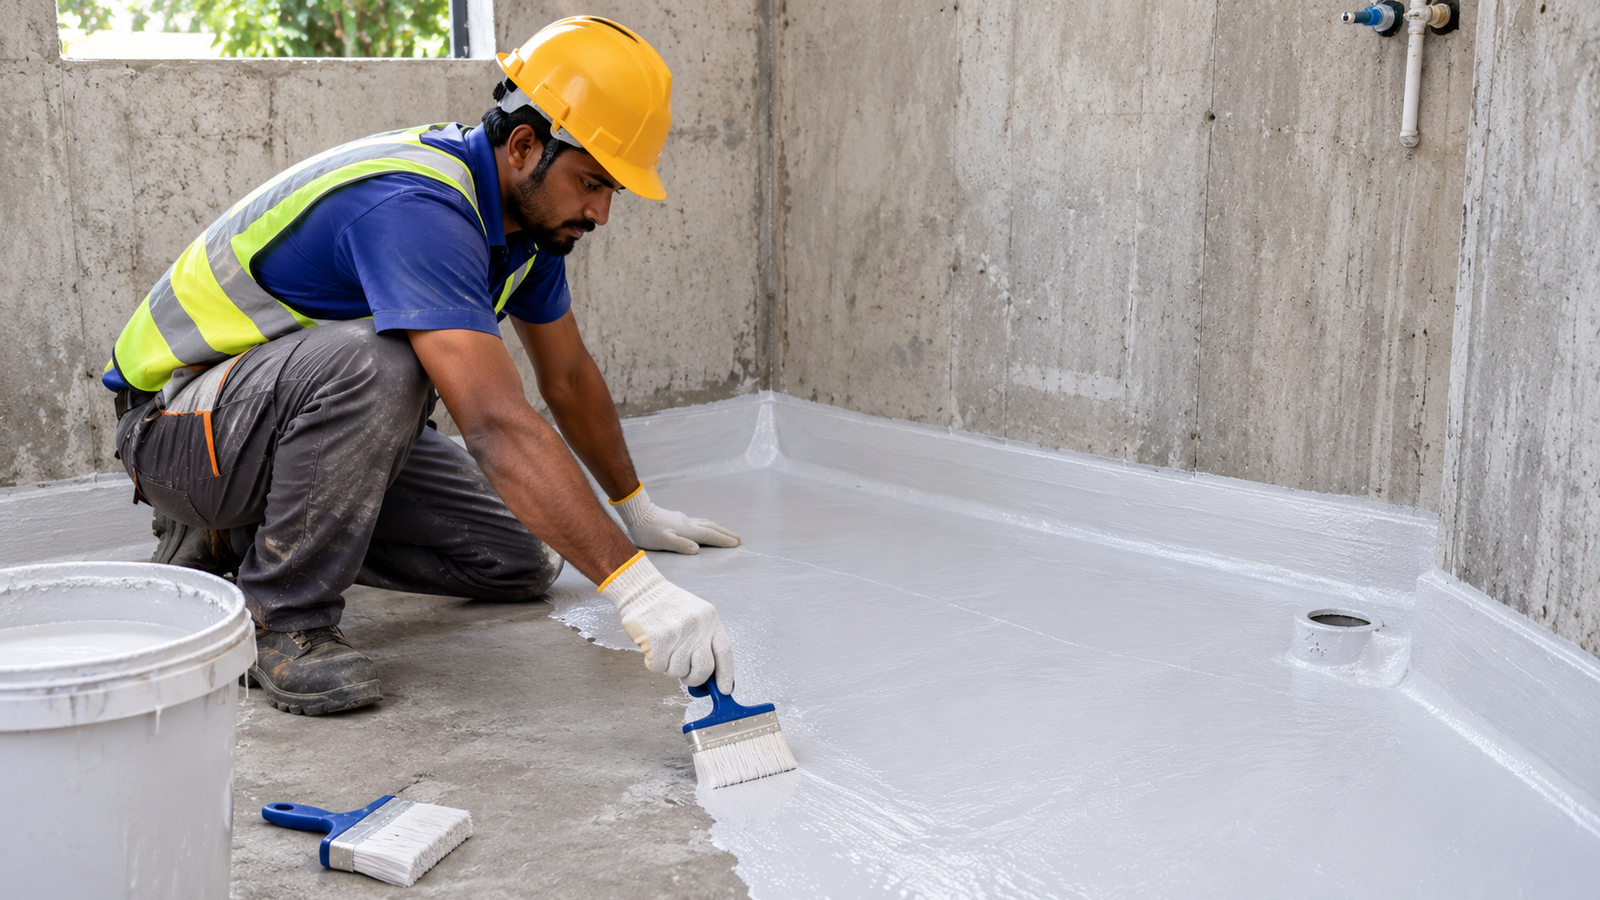
A bathroom that leaks through the floor or walls is one of the most damaging and disruptive problems a Sri Lankan homeowner can face. Water seeping into the slab below causes structural damage, destroys ceilings, breeds mould and — if left long enough — corrodes the reinforcement inside the concrete. This guide explains why bathrooms leak, the critical zones that must be waterproofed, and how professional wet area waterproofing permanently solves the problem.
Whether you are renovating an existing bathroom, building new, or dealing with an active leak into the room below, understanding how bathroom waterproofing works in Sri Lanka's climate is the first step to a lasting solution.
Why Do Bathrooms Leak in Sri Lanka?
Sri Lanka's bathrooms face a tougher environment than those in most countries. High daily humidity, frequent temperature swings between cool mornings and hot afternoons, and heavy water usage from buckets and showers put constant stress on bathroom substrates. The result: bathroom leaks are extremely common — and usually caused by one of the following:
⚠ Common Causes of Bathroom Leaks in Sri Lanka
- No waterproofing membrane: The majority of older Sri Lankan bathrooms were tiled directly onto a cement screed with no waterproofing layer. Water penetrates through grout joints and tile edges daily — eventually saturating the slab and leaking downward.
- Failed floor-wall junction: The join between the bathroom floor and the wall is a critical waterproofing zone. When this junction is not correctly detailed — with a coved fillet and membrane overlap — it becomes the most common point of water entry.
- Cracked grout and tile movement: Thermal expansion causes tiles and the substrate to move. Grout cracks within a few years; water finds these cracks and enters the screed below.
- Poor shower tray or wet area detailing: Shower areas without a proper membrane system — particularly around drain outlets — allow water to bypass the tile layer entirely.
- No pipe penetration sealing: Pipes passing through the floor or walls create gaps that are rarely sealed properly. These become direct water pathways into the structure.
- Degraded sealant around fittings: Silicone sealant around toilet bases, basins and baths degrades within 2–4 years. Once it cracks or shrinks, water enters at every fitting.
Critical Waterproofing Zones in a Bathroom
Not all parts of a bathroom receive the same water exposure. A correctly designed bathroom waterproofing system addresses each zone according to its risk level — using the appropriate system and membrane detail for each area.
Shower / Wet Zone Floor
Receives the highest water volume daily. Requires a continuous, fully bonded flexible membrane with sealed drain outlet and coving at all wall junctions. Minimum 2 coats of membrane to certified consumption.
Floor-Wall Junction (Cove)
The most common failure point. Where the floor meets the wall, a coved fillet must be formed and the membrane must extend a minimum of 150mm up the wall continuously — no gaps, no bridging.
Full Bathroom Floor
Even outside the shower zone, the entire bathroom floor must be waterproofed. Splash water, bucket use and condensation saturate the screed across the whole floor over time.
Walls (Up to 1800mm)
Bathroom walls in the wet zone should be waterproofed to a height of at least 1800mm (full height in shower enclosures). Lower walls receive splash and condensation that penetrates grout over time.
Pipe & Drain Penetrations
Every pipe or drain outlet passing through the floor or wall is a potential water pathway. Each penetration must be individually sealed with compatible mastic and membrane turned into the collar.
Around Fittings
Toilet base, basin surround, bath rim and shower tray edges need correctly profiled sealant joints. These must be maintained and replaced when they degrade — typically every 3–5 years.
Best Waterproofing Systems for Bathrooms in Sri Lanka
Several waterproofing systems are available in Sri Lanka for bathroom and wet area applications. The correct choice depends on the bathroom's water exposure level, substrate condition and whether the installation is new construction or a renovation.
1. Flexible Two-Component Cementitious Slurry (Most Common)
Systems such as Duraflex 100 by Supercrete NZ are the most widely specified for bathroom waterproofing in Sri Lanka. Applied in two coats directly onto the prepared substrate before tiling, these membranes:
- Bond directly to concrete, block and screed — no primer required on most substrates
- Are fully compatible with standard tile adhesives and grouts
- Provide Class A4 crack-bridging (bridges cracks over 1.25mm without failure)
- Are certified for potable water contact — safe for water tanks, pools and wet areas
- Allow tiling within 24 hours of final coat in normal conditions
2. Liquid Polyurethane Membrane (High-Exposure Zones)
For shower trays, sunken bath surrounds and high-exposure zones where additional flexibility is required, a liquid-applied polyurethane membrane provides superior elongation and chemical resistance. Applied by brush or roller before the screed, it forms a seamless membrane with no joins or overlaps.
3. Crystalline Waterproofing (Integral System)
For new construction, a crystalline admixture added to the concrete mix provides waterproofing from within the slab — growing crystals seal capillary pores and self-heal minor cracks. This is used in combination with a surface membrane on critical zones.
| System | Best For | Tile Compatibility | Crack-Bridging | Lifespan |
|---|---|---|---|---|
| Flexible cementitious (Duraflex 100) | Standard bathrooms, renovation | Excellent | Class A4 | 10–15 years |
| Liquid polyurethane | Shower trays, high-exposure | Good | Very high | 10+ years |
| Crystalline admixture | New slab (integral) | Excellent | Self-healing | Life of structure |
| Bituminous paint | Not recommended for bathrooms | Poor | Nil | 2–3 years |
| Silicone sealant only | Maintenance joints only | N/A | Nil | 3–5 years |
The Professional Bathroom Waterproofing Process
A properly executed bathroom waterproofing job is a multi-step process that cannot be rushed. Each step is essential — skipping any one of them, particularly surface preparation or joint detailing, will cause the system to fail prematurely regardless of the quality of the product used.
Free On-Site Inspection
A certified technician inspects the bathroom — assessing the leak source, substrate condition, existing tiles, drainage, pipe penetrations and the full scope of work. A written quotation is provided at no cost.
Strip Existing Tiles & Screed
For a certified, warranted result, existing tiles and failed screed must be removed to expose the structural substrate. This allows the membrane to bond directly to the concrete slab — the only reliable foundation for a long-lasting system.
Substrate Repair & Preparation
Cracks in the slab are filled and profiled. The substrate is cleaned, dusted and dampened as required. A coved fillet (rounded corner) is formed at all floor-wall junctions — this is essential for a continuous membrane at the most critical point.
Membrane Application — Coat 1
The first coat of flexible cementitious membrane is applied to the floor, coving and walls (minimum 150mm up). Drain outlets and pipe penetrations are detailed individually. Full cure time is observed before the next coat.
Membrane Application — Coat 2
The second coat is applied perpendicular to the first to ensure full coverage and correct membrane thickness. Total dry film thickness and consumption per m² are verified against the system specification.
Flood Test (Optional)
For complete verification before tiling, a 24-hour flood test can be conducted — the membrane is ponded with water and the ceiling below is inspected. This confirms continuity before the tiles cover the membrane permanently.
Screed, Tiling & Grouting
Once the membrane is fully cured (typically 24–48 hours), a new screed is applied where needed, followed by tile adhesive and tiles. The grout and tile work does not form part of the waterproofing — the membrane beneath carries the water barrier.
Written 10-Year Warranty Issued
Once the waterproofing work is complete and inspected, a written 10-year warranty is issued. Any membrane defects within the warranty period are addressed at no additional cost.
Bathroom Leaking? Get a Free Inspection
Our certified wet area waterproofing specialists will assess your bathroom, identify the leak source and provide a written quote — free of charge, no obligation. 10-year written warranty on all work.
New Construction vs Bathroom Renovation
The waterproofing approach differs significantly depending on whether the bathroom is being built new or is an existing bathroom being fixed.
New Construction
In new construction, waterproofing should be specified as a mandatory stage before any screed or tiles are laid. This is both cheaper and more effective than retrofitting — the substrate is clean, uncontaminated and undisturbed. There is no tile removal cost, no damage to investigate and no existing screed to work around. A crystalline admixture in the slab concrete, combined with a surface membrane on the floor and wet zone walls, provides the most robust system.
Bathroom Renovation (Existing Leak)
For an existing bathroom that is already leaking, the correct approach is:
- Remove all tiles and existing screed to expose the structural slab
- Identify and repair any cracks or structural defects
- Form coving at all floor-wall junctions
- Apply certified flexible membrane system
- Conduct flood test before re-screeding and tiling
Applying waterproofing over existing tiles is not recommended as a permanent solution — it delays rather than solves the problem, and the warranty cannot be backed by any certified applicator when the substrate condition cannot be verified.
Bathroom Waterproofing Cost in Sri Lanka
Bathroom waterproofing cost in Sri Lanka depends on:
- Bathroom size: A standard Sri Lankan bathroom (50–80 sq ft) requires less material and time than a large ensuite or hotel bathroom.
- Tile removal and disposal: Removing existing tiles adds cost but is essential for a certified result.
- Substrate condition: Cracked or badly damaged slabs require additional repair work before waterproofing can proceed.
- System selected: A standard cementitious membrane is the most cost-effective. High-exposure zones with polyurethane or dual-system specification cost more but perform better in demanding conditions.
- Screed and re-tiling: If the full bathroom renovation is scoped together, the total project cost per m² reduces significantly.
As a general guide, professional bathroom waterproofing in Sri Lanka (membrane application only, excluding tile work) starts from around Rs. 350–600 per sq ft depending on the system and site conditions. The only accurate way to get a price is a free on-site inspection — call us on +94 777 887 307.
Bathroom Waterproofing Across Sri Lanka
WaterProofing.lk — Hi-Tech Concrete Solutions (Pvt) Ltd — provides professional bathroom and wet area waterproofing services island-wide, including Colombo and the Western Province, Kandy and Central Province, and Galle, Kalutara and Negombo. Call us to confirm coverage for your location.